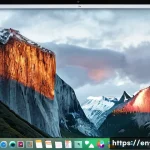
Hey there, fellow Mac enthusiast! Don’t you just love the sleek design, robust security, and intuitive workflow of your MacBook? I know I do!

But let’s be honest, we’ve all been there – that moment when you hit a wall because a crucial piece of software or a must-have game is stubbornly stuck in the Windows ecosystem.
It used to feel like an impossible mission, a frustrating compromise between the best of both worlds. For years, it seemed like the only option was to run two separate machines or deal with clunky workarounds.
But guess what? Times have changed dramatically, especially with the incredible power of Apple Silicon chips pushing the boundaries of what’s possible.
From my personal experience, I can tell you that seamlessly integrating your favorite Windows applications onto your Mac isn’t just a dream anymore; it’s a very real and often surprisingly smooth reality.
I’ve personally navigated the ins and outs of various solutions, from advanced virtualization software that feels native, to clever compatibility layers like Wine and CrossOver, and even exploring the burgeoning world of cloud-based desktops.
I’ve seen firsthand how these tools have evolved, making what once seemed complex, incredibly accessible. Trust me, I understand the desire to have the best of macOS without sacrificing access to those Windows-only essentials.
My own journey led me to discover how straightforward and efficient these methods have become, allowing me to maximize my productivity and even indulge in some Windows-exclusive gaming without breaking a sweat.
So, if you’re tired of limitations and ready to unlock the full, versatile potential of your Mac, you’ve come to the right place. Let’s dig in and get you set up with everything you need to know!
Exploring the Virtual Frontier: Seamlessly Blending Operating Systems
You know, for the longest time, the idea of running Windows apps on my Mac felt like a tech myth, something people talked about but rarely achieved smoothly.
But then, virtualization truly stepped up its game, and suddenly, it became not just possible, but genuinely enjoyable. My go-to has always been virtualization software, and it’s a real game-changer because it creates an entirely separate, isolated Windows environment right within your macOS.
Think of it like having a PC living inside your Mac, perfectly contained. This method is incredibly robust because you’re actually installing a full version of Windows, whether it’s Windows 10 or 11, onto a virtual disk.
This means pretty much any Windows application that would run on a native PC will likely run just as well on your Mac through this setup. I’ve personally used it for everything from complex engineering software that absolutely refuses to run on macOS, to a few older, niche tools that are crucial for specific tasks.
The beauty here is that you get the full Windows experience without ever having to leave your macOS desktop, switching between them with just a click or a gesture.
It’s like having your cake and eating it too, and for someone who values both macOS’s elegance and Windows’ vast software library, it’s a lifesaver. Plus, with Apple Silicon, the performance has become shockingly good, even for demanding applications.
Picking Your Virtualization Champion
When it comes to virtualization software, you’ve got a couple of big players that stand out, and I’ve spent a fair amount of time with both. Parallels Desktop is usually the first name that comes to mind for Mac users, and for good reason.
It’s incredibly user-friendly, almost plug-and-play, and offers fantastic integration with macOS. You can drag and drop files between operating systems, share clipboards, and even launch Windows apps directly from your Dock.
It feels incredibly seamless, and honestly, the performance on Apple Silicon has been mind-blowing; I’ve run some pretty heavy applications without a hitch.
Then there’s VMware Fusion, which often appeals to more professional or enterprise users, but it’s also a solid choice for individuals. While perhaps not as flashy as Parallels in terms of direct macOS integration, Fusion offers powerful features and stability, especially if you need to run multiple virtual machines or specific server-like environments.
My advice? If you’re looking for simplicity and tight macOS integration, Parallels is probably your best bet for a smooth ride right out of the gate. If you’re a bit more tech-savvy or need advanced networking options, Fusion is definitely worth exploring.
Setting Up Your Virtual Machine: A Quick Guide
Getting started with a virtual machine might sound intimidating, but trust me, it’s surprisingly straightforward. First, you’ll need a copy of Windows – usually, you can download an ISO file directly from Microsoft’s website.
Once you have your virtualization software installed, it’s pretty much a guided process. The software will walk you through creating a new virtual machine, prompting you to allocate resources like CPU cores, RAM, and disk space.
Here’s a little tip I learned the hard way: don’t be too stingy with RAM! If you can spare 8GB or more for your virtual machine, you’ll notice a significant difference in performance, especially if you’re running resource-intensive applications.
After that, you’ll point the software to your Windows ISO, and it will begin installing Windows just as if it were a physical PC. Once Windows is installed, the virtualization software will usually prompt you to install its “tools” or “guest additions,” which are crucial for optimal performance, seamless integration, and features like shared folders and drag-and-drop functionality.
It typically takes less than an hour from start to finish, and then you’re ready to dive into the Windows world from the comfort of your Mac.
Unlocking Compatibility: The Magic of Emulation and Compatibility Layers
While virtualization is fantastic for a full Windows experience, it’s not always the lightest or most resource-friendly option, especially if you only need a handful of specific Windows applications.
That’s where emulation and compatibility layers come into play. These methods don’t create an entire virtual operating system; instead, they essentially “translate” Windows application instructions into something your Mac can understand.
It’s a bit like having a universal translator for software. I’ve found these particularly useful for older, less demanding applications or certain games that might not justify the overhead of a full Windows installation.
The beauty is in their efficiency; they often require less disk space and RAM, making them an excellent choice for Macs with limited resources or if you just want to quickly run a single Windows program.
It’s a more targeted approach, focusing on making specific applications run rather than providing a complete Windows environment.
Wine and CrossOver: Your Lightweight Allies
When we talk about compatibility layers, Wine (which stands for Wine Is Not an Emulator, ironically) is a name that frequently pops up. Wine is an open-source compatibility layer that allows you to run many Windows applications on macOS and Linux.
It’s not a virtual machine, nor is it an emulator in the traditional sense; it translates Windows API calls into POSIX calls on the fly. Now, I won’t lie, Wine itself can be a bit tricky to set up for the average user, often requiring some command-line tinkering.
That’s where CrossOver comes in, and it’s been an absolute lifesaver for me on several occasions. CrossOver is a commercial product built on Wine, but it provides a much more user-friendly interface and handles all the complex configurations for you.
You simply install CrossOver, tell it what Windows application you want to run, and it often just works. I’ve had surprising success with some legacy business applications and even a few older PC games that don’t have Mac versions.
It’s truly impressive how well it can bridge the gap for specific applications without the heavy lifting of a full virtual machine.
Rosetta 2 and the Apple Silicon Advantage
It would be remiss not to mention Rosetta 2 when talking about running non-native applications on Apple Silicon Macs. While Rosetta 2 is primarily designed to allow Intel-based macOS applications to run seamlessly on Apple Silicon chips, its underlying technology for instruction translation is truly remarkable.
While it doesn’t directly run Windows applications, it plays a critical role in the context of virtualization. For instance, virtualization software like Parallels Desktop leverages the power of Apple Silicon to run ARM-based versions of Windows (like Windows 11 for ARM).
Then, within that ARM version of Windows, if you need to run a traditional Intel-based Windows application, the ARM version of Windows itself has its own compatibility layer (similar in concept to Rosetta 2) that allows those Intel apps to run.
It’s a layer-on-layer solution, but thanks to the sheer power and efficiency of Apple Silicon, the performance hit is often surprisingly minimal. This is a game-changer because it means even if your target Windows app is Intel-based, you can still run it quite effectively on your Apple Silicon Mac through an ARM-based Windows virtual machine.
It’s a testament to how far Apple has pushed the envelope in compatibility.
The Cloud Revolution: Accessing Windows Anywhere, Anytime
Okay, so we’ve talked about bringing Windows to your Mac locally, but what if you could access a full-blown Windows machine from anywhere, on any device, including your Mac?
That’s the magic of cloud-based desktops, and it’s a trend that’s really exploded recently. For me, this has been an incredible solution for situations where I need powerful Windows-only software but don’t want to dedicate local resources on my Mac, or if I’m on a travel-light setup.
Essentially, you’re renting a virtual Windows computer that lives in a data center somewhere, and you access it over the internet. It streams the desktop to your Mac, and you interact with it as if it were local.
The beauty of this is that the heavy lifting – all the processing power, storage, and graphics rendering – happens remotely. Your Mac is simply acting as a display and input device.
Cloud Desktops: Flexibility and Power on Demand
There are several fantastic services out there offering cloud-based Windows desktops, and they each have their own strengths. Services like Microsoft 365 Business Premium (which includes Windows 365 Cloud PC), Amazon WorkSpaces, and various remote desktop solutions allow you to spin up a fully configured Windows environment in minutes.
The level of customization is usually pretty high, letting you choose the amount of RAM, CPU cores, and storage you need. What I love about this approach is the sheer flexibility.
I can literally access my exact Windows setup from my MacBook at home, my iPad while traveling, or even a friend’s computer if I need to. This is particularly appealing for professionals who need access to specific enterprise software or for anyone who works with extremely demanding applications that might tax even a high-end Mac.
Plus, security is often top-notch, with data stored securely in the cloud rather than locally on your device.
The Nitty-Gritty: Latency and Connectivity
Now, while cloud desktops offer unparalleled flexibility, there’s one crucial factor to consider: your internet connection. Since you’re streaming a desktop over the web, a stable and fast internet connection is absolutely essential.
I’ve found that even minor fluctuations in Wi-Fi can lead to noticeable latency, which can be frustrating, especially if you’re working with design software or anything that requires precise input.
Ideally, you want a broadband connection with low ping. Another thing to keep in mind is data usage; streaming a desktop can consume a fair bit of bandwidth, so keep an eye on your data caps if you’re not on an unlimited plan.
However, for most modern internet connections in urban areas, it’s generally a smooth experience. The convenience of having a powerful Windows machine accessible from anywhere often outweighs these minor considerations for many users, including myself, especially when I need to jump into a Windows environment for quick tasks or specialized work.
Gaming on Your Mac: Beyond the Native Realm
Let’s be real, a lot of us Mac users have a secret longing to play some of those incredible PC-exclusive games. For years, this was the ultimate forbidden fruit.
While native Mac gaming has certainly improved, the vast majority of AAA titles still launch exclusively or primarily on Windows. This used to mean dual-booting with Boot Camp (RIP for Apple Silicon users!) or just giving up on certain games.
But now, with the methods we’ve discussed, gaming on your Mac, even Windows-only titles, is becoming a much more viable and enjoyable reality. I’ve spent countless hours experimenting with different setups, and I can tell you, the feeling of running a Windows game on my Mac that I never thought possible is incredibly satisfying.
Virtualization for Gaming: A Realistic Expectation
When it comes to gaming with virtualization software like Parallels Desktop, it’s important to set realistic expectations. While Apple Silicon Macs are incredibly powerful, and Parallels has made huge strides, running graphically intensive AAA games in a virtual machine isn’t going to be the same as running them on a dedicated Windows gaming rig.
That said, for many older titles, indie games, or less demanding Windows games, virtualization can work surprisingly well. I’ve personally had great success with titles like *The Witcher 3* (on lower settings) and *Grand Theft Auto V* running through Parallels Desktop on my M-series Mac, which blew my mind!
The key is that Parallels now supports DirectX 11 and even some DirectX 12 features, allowing many modern games to at least launch and be playable. You might need to tinker with in-game settings to find the sweet spot between performance and visual quality, but the fact that it’s even an option is incredible.
Cloud Gaming and Emulation for the Win
For the most demanding, graphically intensive games, cloud gaming services are often your best bet for a seamless experience on a Mac. Services like GeForce NOW, Xbox Cloud Gaming, and Amazon Luna stream the game directly from powerful servers, meaning your Mac just needs a good internet connection.
The game itself runs on the remote hardware, and you get to enjoy buttery-smooth frames and high resolutions without your Mac breaking a sweat. I’ve found this to be an excellent solution for trying out the latest releases without committing to a full Windows setup.
Another avenue for gaming on your Mac is through compatibility layers like CrossOver, especially for specific titles. CrossOver has a thriving community that often shares tips and tricks for getting popular Windows games to run.
While not every game will work perfectly, many older classics and even some newer titles are quite playable, offering a less resource-intensive alternative to virtualization.
Choosing Your Path: Finding the Perfect Solution for Your Needs
Navigating the world of running Windows apps on your Mac can feel a bit like choosing your own adventure. There isn’t a one-size-fits-all answer, and what works perfectly for one person might be overkill or insufficient for another.
My own journey involved a lot of trial and error, figuring out which solution best suited my specific workflow and the types of applications I needed.
The key is to assess your requirements honestly: what kind of Windows software do you need? How often do you need it? What are your performance expectations?
Once you have a clear picture of these factors, picking the right tool becomes much clearer.

A Comparison of Popular Methods
Let’s break down the main contenders to help you decide. I’ve put together a quick table comparing the most common methods to run Windows applications on a Mac, based on my hands-on experience:
| Method | Pros | Cons | Ideal Use Case |
|---|---|---|---|
| Virtualization (e.g., Parallels Desktop, VMware Fusion) | Full Windows OS experience, high compatibility, seamless macOS integration, good performance on Apple Silicon. | Requires a Windows license, consumes local storage and RAM, some overhead for very demanding apps/games. | Users needing a complete Windows environment, professional software, development, moderate gaming. |
| Compatibility Layers (e.g., CrossOver, Wine) | No Windows license needed, lightweight, uses less resources, good for specific apps. | Compatibility can be hit-or-miss for certain applications, performance varies, not a full Windows OS. | Running specific older or less demanding Windows applications/games, saving resources. |
| Cloud Desktops (e.g., Windows 365, Amazon WorkSpaces) | Access from anywhere, powerful remote hardware, minimal local resources needed, high security. | Requires stable and fast internet, subscription costs, potential latency, data usage. | Professionals needing high-powered Windows apps on the go, enterprise software, remote work, thin client scenarios. |
| Cloud Gaming (e.g., GeForce NOW, Xbox Cloud Gaming) | Play demanding games without powerful local hardware, access to large game libraries. | Requires excellent internet, subscription costs, only for gaming. | Hardcore gamers wanting to play the latest Windows titles on their Mac, casual gaming. |
Considering Your Budget and Technical Comfort
Beyond the technical aspects, your budget and how comfortable you are with a bit of technical setup also play a role. Premium virtualization software like Parallels Desktop or VMware Fusion comes with a cost, but that investment often pays off in terms of convenience and performance.
CrossOver also has a purchase price, but it’s generally a one-time fee. Cloud-based services, on the other hand, usually operate on a subscription model, so you’ll have recurring costs, but you gain immense flexibility and often access to much more powerful hardware than you’d have locally.
If you’re someone who loves to tinker and isn’t afraid of a bit of command-line work, exploring the free version of Wine might be an exciting challenge.
However, if you prefer a ‘set it and forget it’ solution, the commercial options are usually well worth the money for the time and frustration they save.
My personal experience has been that investing in a reliable solution upfront prevents a lot of headaches down the line.
Optimizing Performance: Getting the Most Out of Your Setup
So, you’ve chosen your method and you’re all set up – fantastic! But the journey doesn’t end there. Just like with any computer, optimizing your setup can make a world of difference in performance and your overall experience.
I’ve spent countless hours tweaking settings and trying different configurations to squeeze every last drop of performance out of my Mac when running Windows apps, and I’ve learned a few invaluable tricks along the way.
It’s not just about getting things to run; it’s about making them run *well*. There’s nothing more frustrating than a choppy frame rate or a sluggish application when you know your Mac is capable of more.
Tweaking Virtual Machine Settings
If you’re using a virtualization solution, this is where you can really fine-tune things. The most critical settings are CPU cores and RAM allocation.
While it might be tempting to give your virtual machine all available cores and memory, that’s usually not the best approach, as macOS still needs resources to run smoothly itself.
I’ve found a good balance is to allocate about half to two-thirds of your Mac’s CPU cores and about 4GB to 8GB of RAM, depending on your total memory.
For example, if you have an M3 Pro Mac with 16GB of RAM, allocating 6-8GB to your VM is a good starting point. You can always adjust these later. Also, make sure your virtual disk is on an SSD (which most modern Macs have) for the best read/write speeds.
Within the Windows VM itself, ensure you have the latest drivers installed (especially the ones provided by your virtualization software), keep Windows updated, and consider adjusting power settings to “High Performance.” Disabling unnecessary visual effects in Windows can also give a small boost.
Ensuring Smooth Sailing with Compatibility Layers and Cloud
For compatibility layers like CrossOver, performance optimization often comes down to ensuring you have the latest version of the software, as developers are constantly improving compatibility and performance with each update.
It’s also worth checking CrossOver’s compatibility database; often, users share specific tips or workarounds for individual applications that can dramatically improve performance.
Sometimes, a different “bottle” (CrossOver’s term for isolated Windows environments) configuration might work better for a particular app. When it comes to cloud desktops and gaming, performance is almost entirely dictated by your internet connection.
My biggest tip here is to use a wired Ethernet connection whenever possible. Wi-Fi is convenient, but it introduces more variables and potential for latency spikes.
If wired isn’t an option, ensure you’re on a 5GHz Wi-Fi network with good signal strength, and try to minimize other network activity on your home network while you’re working or gaming in the cloud.
Even small details like closing unnecessary browser tabs can help ensure your bandwidth is fully dedicated to your cloud experience.
Troubleshooting Common Hurdles: My Go-To Fixes
Okay, let’s be real – tech isn’t always smooth sailing. There will inevitably be moments when something doesn’t work quite right, and you’re left scratching your head.
I’ve certainly had my fair share of “why isn’t this working?!” moments when trying to run Windows apps on my Mac. It’s part of the learning curve, and honestly, figuring out a stubborn issue can be incredibly satisfying.
So, I want to share some of my most frequent troubleshooting tips and tricks that have saved me from countless headaches over the years. These are the first things I check when things go awry.
When Apps Refuse to Launch or Crash
This is probably the most common issue you’ll face. If a Windows app won’t launch or crashes immediately in your virtual machine or compatibility layer, the first thing I do is check for updates.
Make sure your virtualization software or CrossOver is on its latest version, and within your Windows VM, ensure Windows itself and all its drivers are fully updated.
Sometimes, a simple restart of the virtual machine or your Mac can clear up transient issues. If the problem persists, try reinstalling the problematic Windows application within the VM.
For CrossOver users, sometimes creating a fresh “bottle” for the application can resolve conflicts. I’ve also found that adjusting graphics settings within the Windows app to lower resolutions or quality can sometimes prevent crashes, especially with games or graphically intensive software if your allocated resources are a bit tight.
Finally, check online forums specific to the application or your chosen solution; chances are, someone else has encountered and solved the exact same issue.
Performance Woes and Unexpected Lag
If your Windows apps are running but feeling sluggish, it’s often a resource allocation issue. In a virtual machine, go back into your virtualization software’s settings and incrementally increase the allocated RAM or CPU cores to the VM.
Remember my earlier tip: don’t be shy about giving it enough memory if your Mac has it to spare. Also, ensure your Mac isn’t running too many other demanding applications in the background, which can starve your VM of resources.
For cloud-based solutions, lag almost always points to your internet connection. Run a speed test to check your bandwidth and ping. If possible, switch to a wired connection or move closer to your Wi-Fi router.
If you’re still experiencing issues, contact your internet service provider or consider upgrading your plan if bandwidth is consistently low. Sometimes, the remote server might also be experiencing congestion, so trying again later can occasionally resolve the issue.
Don’t forget to keep an eye on your Mac’s own activity monitor; sometimes, a rogue macOS process can be causing unexpected system-wide slowdowns.
Embracing the Best of Both Worlds: A Personal Takeaway
Honestly, the journey of integrating Windows applications into my Mac workflow has been incredibly rewarding. What started as a frustrating compromise has evolved into a seamless, powerful experience that truly gives me the best of both operating systems.
There’s a unique satisfaction in being able to switch from editing a video in Final Cut Pro to firing up a Windows-exclusive CAD program, or even jumping into a PC game, all from the same beautiful hardware.
My Mac isn’t just a Mac anymore; it’s a versatile powerhouse that can tackle virtually any software I throw at it, regardless of its native platform.
My Experience with Versatility and Productivity
I vividly remember the days when I thought I needed a separate PC just to run a few specialized Windows applications for a freelance project. It felt clunky, inefficient, and expensive.
But after diving deep into virtualization and compatibility layers, I realized just how much potential I was leaving untapped on my Mac. Being able to have my entire workflow, both macOS and Windows-dependent, consolidated onto a single machine has boosted my productivity immensely.
The ability to quickly reference Windows documentation while working on a Mac project, or vice-versa, without having to switch physical machines or even deal with dual-booting, is invaluable.
It’s not just about running the apps; it’s about the fluidity and continuity it brings to your work and even your leisure.
The Future is Cross-Platform
Looking ahead, I truly believe that the lines between operating systems will continue to blur, especially with the incredible advancements in Apple Silicon and the growing sophistication of virtualization and emulation technologies.
We’re moving towards a future where the hardware is the primary consideration, and the software you run on it becomes much less constrained by the operating system itself.
For Mac users, this means an increasingly expansive world of possibilities. My advice? Don’t let perceived limitations hold you back.
Explore the options, experiment with what works best for your specific needs, and embrace the versatility that your Mac truly offers. You might just find, like I did, that your favorite machine is far more capable than you ever imagined, opening up a whole new realm of productivity and enjoyment.
글을마치며
And there you have it, folks! It’s truly amazing how far we’ve come in bridging the gap between macOS and Windows. What once felt like a formidable challenge has transformed into a remarkably accessible and often seamless experience, thanks to continuous innovation in virtualization, emulation, and cloud technologies. For me, this journey has been about unlocking the full potential of my Mac, turning it into an all-in-one powerhouse that effortlessly handles every piece of software I need. It’s about embracing versatility and never letting an operating system dictate your productivity or enjoyment. I hope my shared experiences help you navigate this exciting landscape and find your perfect cross-platform solution!
알아두면 쓸모 있는 정보
1. Always prioritize software updates for your chosen virtualization solution or compatibility layer; these often include crucial performance enhancements and compatibility fixes.
2. For virtual machines, be generous with RAM allocation if your Mac has it to spare. More RAM usually means smoother performance, especially for demanding applications.
3. If you’re leaning into cloud desktops or cloud gaming, invest in a stable, high-speed internet connection, ideally wired, to minimize latency and ensure a fluid experience.
4. Check online compatibility databases or user forums for specific Windows applications you plan to run. Others might have already discovered optimal settings or workarounds.
5. Don’t overlook the potential of free or open-source solutions like Wine, especially if you’re comfortable with a bit of tinkering and only need a handful of specific applications to run.
중요 사항 정리
Ultimately, running Windows applications on your Mac is not just feasible but incredibly rewarding. Whether you opt for a full virtual machine experience, a lightweight compatibility layer, or a powerful cloud-based solution, your Mac is more capable than ever before. The key is to assess your individual needs, budget, and comfort level with technology, then choose the method that best empowers your workflow and opens up new possibilities. Embrace the flexibility, enjoy the expanded software library, and make your Mac the truly versatile machine it’s meant to be.
Frequently Asked Questions (FAQ) 📖
Q: What are the most effective methods for running Windows apps and games on an
A: pple Silicon Mac, and which one is right for me? A1: Oh, this is the million-dollar question, isn’t it? From my own adventures in blending macOS and Windows, I’ve found three main champions, especially with our amazing Apple Silicon Macs:First up, we have Virtualization Software, and honestly, Parallels Desktop is usually the first name that comes to mind, with VMware Fusion as a strong contender.
Think of them as creating a completely separate, virtual Windows computer right inside your Mac. You install a full version of Windows for ARM (yep, that’s important for Apple Silicon!) within this virtual machine, and then you can install almost any Windows application or game just as if you were on a native PC.
What I’ve personally experienced is near-native performance for many productivity apps and even a surprising number of games, thanks to Parallels’ excellent optimization for Apple Silicon.
It’s truly remarkable how smooth it feels. If you need full Windows functionality, or have highly demanding software that requires deep system access, this is often your best bet.
Next, there are Compatibility Layers, like CrossOver. Now, this one’s fascinating because it doesn’t actually install Windows. Instead, it translates Windows commands into macOS commands on the fly, allowing certain Windows applications to run directly on your Mac.
It’s like having a universal translator for your software! I’ve had great success running older games and specific Windows utilities with CrossOver, and the beauty is you don’t need a Windows license.
It’s generally less resource-intensive than virtualization because you’re not running a full OS. For gamers, especially, keep an eye on developments like Apple’s Game Porting Toolkit, which CrossOver often integrates or draws inspiration from to enhance game compatibility and performance.
It’s not a silver bullet for every app, but when it works, it’s incredibly efficient. Finally, let’s not forget Cloud PC or Cloud Gaming Services. This is a completely different beast, and honestly, it’s a game-changer for some.
Services like GeForce NOW for gaming, or Shadow PC for a full Windows desktop experience, let you stream a powerful Windows computer from the cloud directly to your Mac.
You’re not actually running Windows on your Mac; you’re just viewing and controlling it remotely. The biggest upside here is that your Mac’s hardware specifications are almost irrelevant; as long as you have a stable, fast internet connection, you can play the most graphically intense games or run the heaviest software with ease.
I’ve used this for competitive gaming when I needed peak performance that even my Mac couldn’t deliver natively, and the experience was surprisingly fluid.
It’s fantastic for those who want pure power without the local hardware constraints. So, which one is for you? If you need a complete Windows environment, virtualization is the way to go.
If you want to run specific apps without the overhead of a full OS, try CrossOver. And if raw power and minimal local impact are your priorities, especially for high-end gaming or professional applications, cloud services are definitely worth exploring.
I often recommend trying a demo or trial for each to see what truly fits your workflow!
Q: Is it truly possible to get good performance, especially for gaming, when running Windows software on a Mac, and what should I expect?
A: Absolutely! This used to be a point of frustration for many of us Mac users, but let me tell you, with the advent of Apple Silicon, the landscape has changed dramatically.
When I first started experimenting with running Windows apps, I was skeptical, especially about gaming. We’ve all heard the old adage that Macs aren’t for gaming, right?
But my personal experience, particularly with my M-series MacBook, has proven that wrong, at least in many scenarios. For everyday productivity apps like Microsoft Office, QuickBooks, or even specialized design software, running them in a virtualized environment like Parallels Desktop on an Apple Silicon Mac feels almost indistinguishable from running them natively on a Windows PC.
The performance is incredibly snappy, applications launch quickly, and multitasking is seamless. I’ve juggled demanding spreadsheets, video calls, and web browsing simultaneously in a virtual Windows environment, and my Mac barely breaks a sweat.
It’s a testament to how efficiently Apple Silicon handles virtualization. Now, for gaming, it’s a bit more nuanced, but still very promising! If you’re using Parallels Desktop with Windows for ARM, many games that run well on Windows ARM devices (which are becoming more common!) will run quite smoothly.
Some titles even benefit from Parallels’ DirectX translation layer, allowing games designed for x86 Windows to run surprisingly well. I’ve personally enjoyed titles like Grand Theft Auto V and Cyberpunk 2077 (albeit with adjusted settings) within Parallels, which was unthinkable just a few years ago.
You won’t always hit ultra settings at 120 FPS, but a perfectly playable and enjoyable experience is very much within reach for a wide range of popular games.
With CrossOver, performance often hinges on how well a specific game has been “ported” or is compatible with its translation layers. Newer technologies, sometimes incorporating elements from Apple’s Game Porting Toolkit, have vastly improved the performance of many DirectX 11 and 12 titles.
I’ve seen games that struggled just a year or two ago now run smoothly with good frame rates through CrossOver. It’s not a guarantee for every single AAA title, but for many popular and indie games, the performance can be surprisingly good, often feeling much closer to native than you’d expect from a compatibility layer.
The crucial thing to manage your expectations is that while the performance is excellent for many applications and games, it might not always match a high-end, dedicated Windows gaming PC.
You might need to tweak in-game settings (think medium to high rather than ultra) to get the best frame rates, but that’s a small compromise for the convenience of having everything on one machine.
The key takeaway from my journey? Don’t let old preconceptions hold you back; modern Macs with Apple Silicon are seriously capable machines for running Windows software!
Q: What are the common pitfalls or challenges I might encounter when setting up Windows applications on my Mac, and how can I avoid them?
A: Ah, excellent question! While the journey to integrating Windows apps on your Mac is smoother than ever, it’s not without its little bumps in the road.
From my own trial-and-error moments, I’ve learned a few things that can save you a headache or two. One of the first things you might run into, especially if you go the virtualization route, is the Windows license.
Remember, you’ll need a legitimate copy of Windows for ARM. This isn’t usually something you can just pull from an old PC; it’s a specific version. I once tried to cut corners and use an old x86 Windows key, only to find out it simply wouldn’t activate in the ARM environment.
So, budget for a proper Windows 11 for ARM license – it’s a necessary investment for a stable and legal setup. Another common challenge, particularly for gamers, is driver compatibility and anti-cheat software.
While virtualization and compatibility layers have come leaps and bounds, some highly competitive online games use very aggressive anti-cheat systems that can mistake your virtual or translated environment for a cheat and prevent the game from launching.
This isn’t a flaw in the emulation software but a specific security measure. I’ve personally had to accept that a handful of my favorite online shooters just won’t run on my Mac this way.
For drivers, generally, the virtualization software handles most of it, but if you’re trying to use very specific, niche hardware, you might run into issues.
Always check the official forums or compatibility lists for the software you’re using. Then there’s the inevitable performance tuning. While I said performance is great, sometimes an app or game might feel sluggish.
This could be due to not allocating enough RAM or CPU cores to your virtual machine. I’ve been there, scratching my head, only to realize I’d only given my Windows VM 4GB of RAM when the app really wanted 8GB.
Don’t be shy about adjusting these settings in Parallels or VMware Fusion. A little extra memory or an additional CPU core can make a world of difference.
Also, remember to keep both your macOS and your chosen solution (Parallels, CrossOver, etc.) updated, as performance improvements are constantly being rolled out.
Finally, a less common but still frustrating issue can be niche application compatibility. While major software generally works, some highly specialized or legacy Windows applications might simply refuse to cooperate, even with the best efforts.
Before committing to a full setup, if you have a very specific, critical Windows-only application, I always recommend checking if there’s a community report or an official compatibility statement.
Most virtualization software offers trial periods for a reason – use them to thoroughly test your essential apps! By being aware of these potential hurdles and planning for them, your journey to a dual-OS workflow on your Mac will be much smoother and far more enjoyable.